First, I stuffed them with two pillow inserts, instead of one. It makes them slightly awkwardly shaped, but workable and not looking sad and pathetic. However, the flange on the pillows was still not good. Sometimes I wish my style were less contemporary and a little more traditional, because one way to avoid this problem is to use a ruffle instead of a flange. But ruffles would have looked ridiculous on this bedding set, so I'm stuck with a flange. Here's how I made it work...

First, I ripped out the stitching that created the flange with a seam ripper. This is very easy to do because the only thing creating the flange is a row of running stitches.

Then I flipped the sham inside out and ironed it so it would be flat.

The flange on these shams was about 1 3/4" so I cut a 2 1/2" wide strip of buckrum. I cut it so it was about 1/4" shorter than the length of the seam (you will see why later). Buckrum is a stiffener often used to make curtains. You can find it at JoAnn's for about $5 yard. A yard was more than enough for both shams. I pinned it in place so that the outer edge was along the seam (not the raw edge, you want it to lay flat, not be folded over when you invert the sham).

I had to redo this about 3 times because I kept messing it up. So here's what I learned (the hard way). First, pin on the front of the sham, not the back (where the overlap is). Second, pin along the outer edge first. At this point, it's okay if you go through both layers of fabric.

Next, put something hard that you can't push a pin into inside the pillow sham (I used a random piece of plexi-glas I had laying around). Then using the plexi-glas as a barrier, pin along the inside of the buckrum, but only go through the front layer of fabric. Why? Because you're going to sew from the outside, so you can't have pins along the outer edge, or you'll never get them back out. And if your pins go through both layers of fabric, you won't be able to invert it.

Once you've pinned the buckrum in place, invert the pillow case. You will need to fuss with it a little to get it back in place (because its only pinned on one side). This is also why you need it a little shorter than the length. If it is even slightly longer than the inside length, it will not fit inside the sham and lay flat. (Yet another thing I had to do twice...) Once its in place and flat, iron your seams so they are smooth.
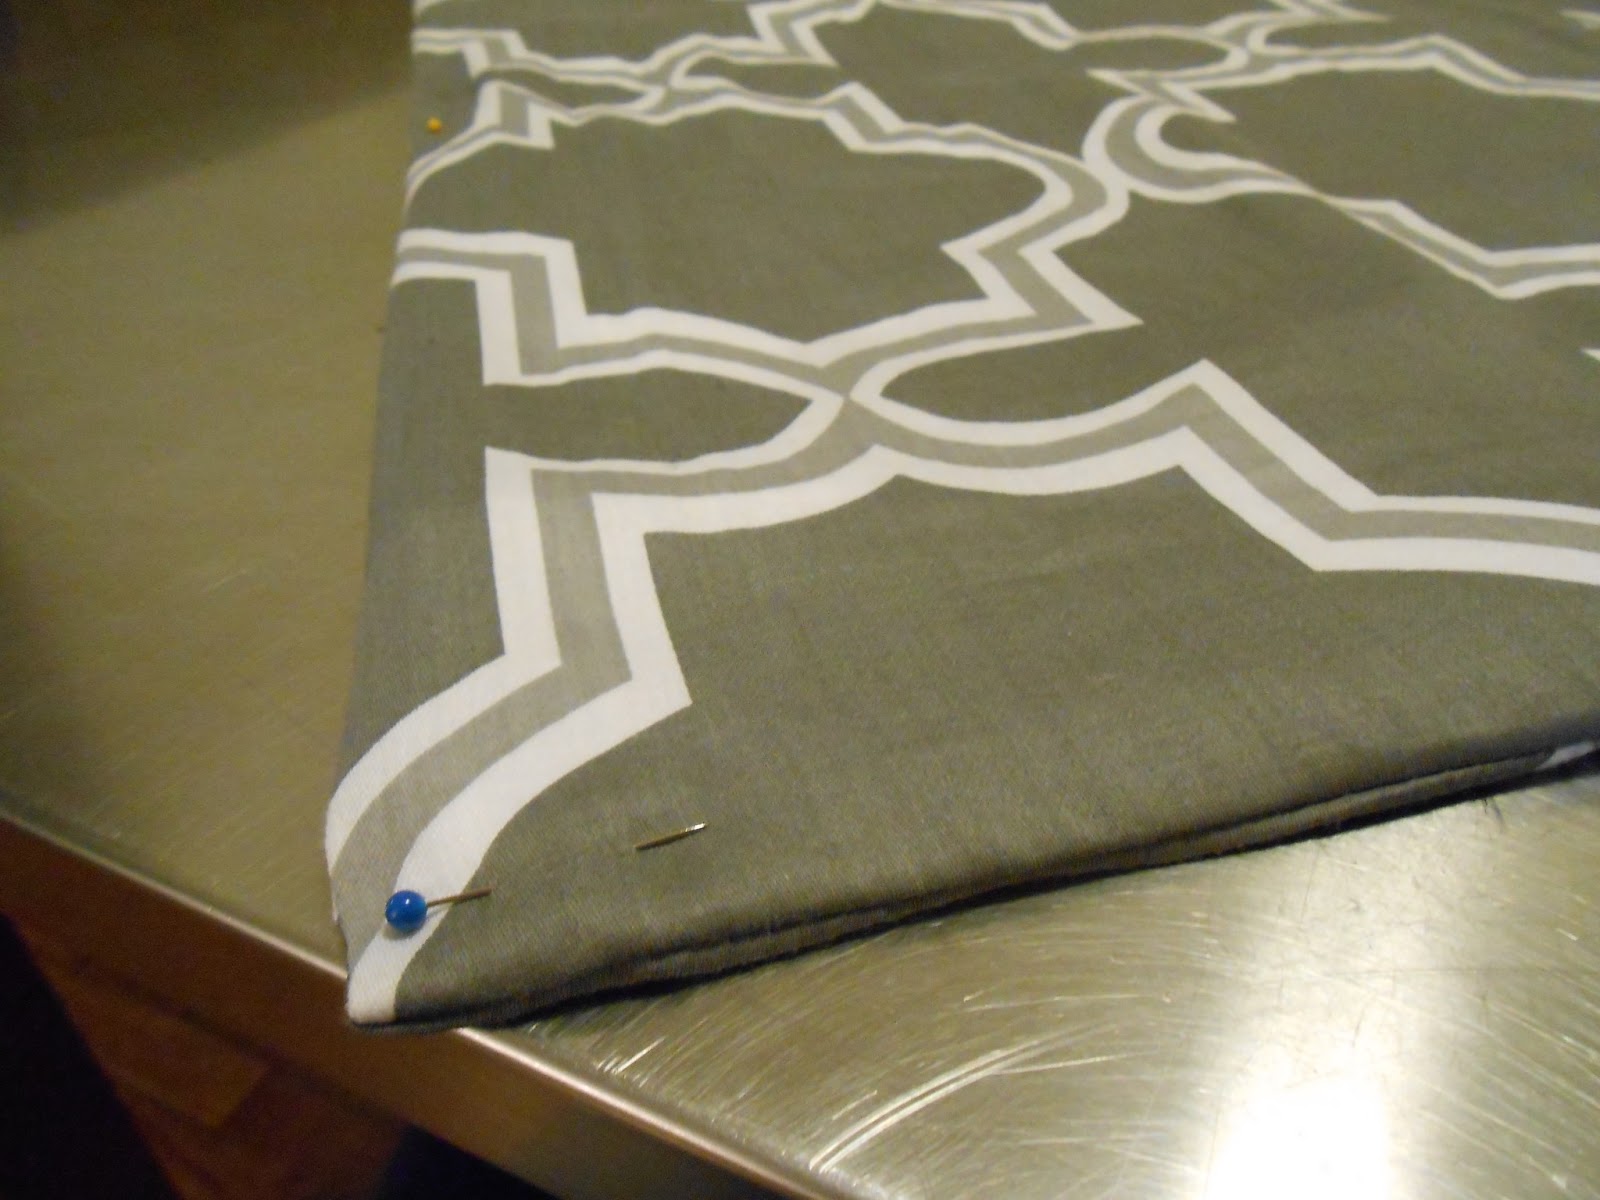
You may need to pin the corners together (from the outside) so it doesn't move.

Finally, using a matching thread, restitch the flange. You should be able to see the needle holes from the original stitching, so use that as a guide. You should notice that the buckrum now fills the entire flange, and extends into the body of the pillow about 3/4". This is critical! If the buckrum were only the width of the flange, it would not help it stand up, it would be stiff, but still falling over.

The finished product...Flange that stands up nicely!
Total cost of project
Shams part of the $40 bedding set I bought...not counting it in project cost.
Buckrum $4 (it was on sale!)
Thread $2
Total $6
Let me know what you think and/or if you try this project for yourself!
Grace and love,
Jenn

Helpful, Jennifer, I too fret over floppy flanges. Did you consider a fusible interface? And possibly covering the entire front body/flange? If you did, let me know your thoughts.
ReplyDeleteThanks, Vickie