Showing posts with label DIY Home Improvement. Show all posts

Monday, March 18, 2013

Redecorating 2013 - Fabric Flower Wreath

My latest project from my redecorating kick (so close to being done...which my checkbook will greatly appreciate!) was to make a new wreath for my front door.  For the last few years I had been using a simple berry wreath, but alas, the sun has finally damaged it to a point that I can no longer stomach looking at it.

So I found a couple of ideas on pinterest that I liked.  These are from Little Page Turners & Teach.Craft.Love.


What I love about this project is that I only had to buy one thing...everything else I had!  Here's what I scrounged up or bought - an old wreath, some fabric scraps leftover from other projects and some simple 4" house numbers.


This was an old Christmas wreath that, like my last door wreath, had faded from the sun and weather.  So I removed all the berries, leaves & pine cones, leaving a basic grapevine wreath.  (I made that sound easy, but it definitely required the use of some wire cutters...they were not messing around when they put this together!)  I also remove a couple of the brown wires that were holding the wreath together, so it looked a little better.


Next, I made some fabric flowers.  I'll show you how, but if you still don't get it, check out Little Birdie Secrets - this is where I learned how and she has a video tutorial if the pictures aren't making enough sense.

Start with a 1" strip of fabric.  Depending on how long it is will determine how big your flower turns out.


Fold it in half lengthwise.


Tie a knot in the end.


Fold the short end of the knot back towards the long end and start wrapping and twisting the long end in a coil.  You can play with this to see what works, but I found that one twist for every 1/4-1/3 of a revolution was good.  So at the beginning you are twisting more often, but as the flower gets bigger, there is more distance between the twists.  This is good as it will help it stay together.


The tutorial I mentioned used a LOT of glue, she said every 1/4-1/2 revolution to use a spot of glue.  I didn't find this to be necessary, but I also wasn't using shiny or slippery fabrics.  So do what works.  If I noticed the flower starting to slip and come apart, I added glue to keep it together.  I used Aleene's Fabric Fusion and it worked well.  (As a side note, its a good thing that it's non-toxic because I got more than I ever hoped for in my mouth!  I kept taking the cap off with my teeth because my hands were full - flower in one hand, bottle in the other...when I went to put the cap, which was between my teeth, back on...I missed.  More than once.  Gross!)


When you get to the end, you have two choices.  If this flower is as big as you want it, skip the next step and glue it in place.  If not, you can work in another piece of fabric to make the flower larger.


Put a bit of glue about 2 inches from the end so you can let go of the flower without it falling apart.  Then take a second strip that is the same size and lay it inside the first strip and fold them together.  The first fabric should be on top.  You may need to glue them together.


Then, continue to twist the fabric together until the flower is done.  Secure the end with glue.  You may want to stick a straight pin in it to hold it together until the glue dries.


Tada!  A fabric rose!  Well, one anyways...you will need many...
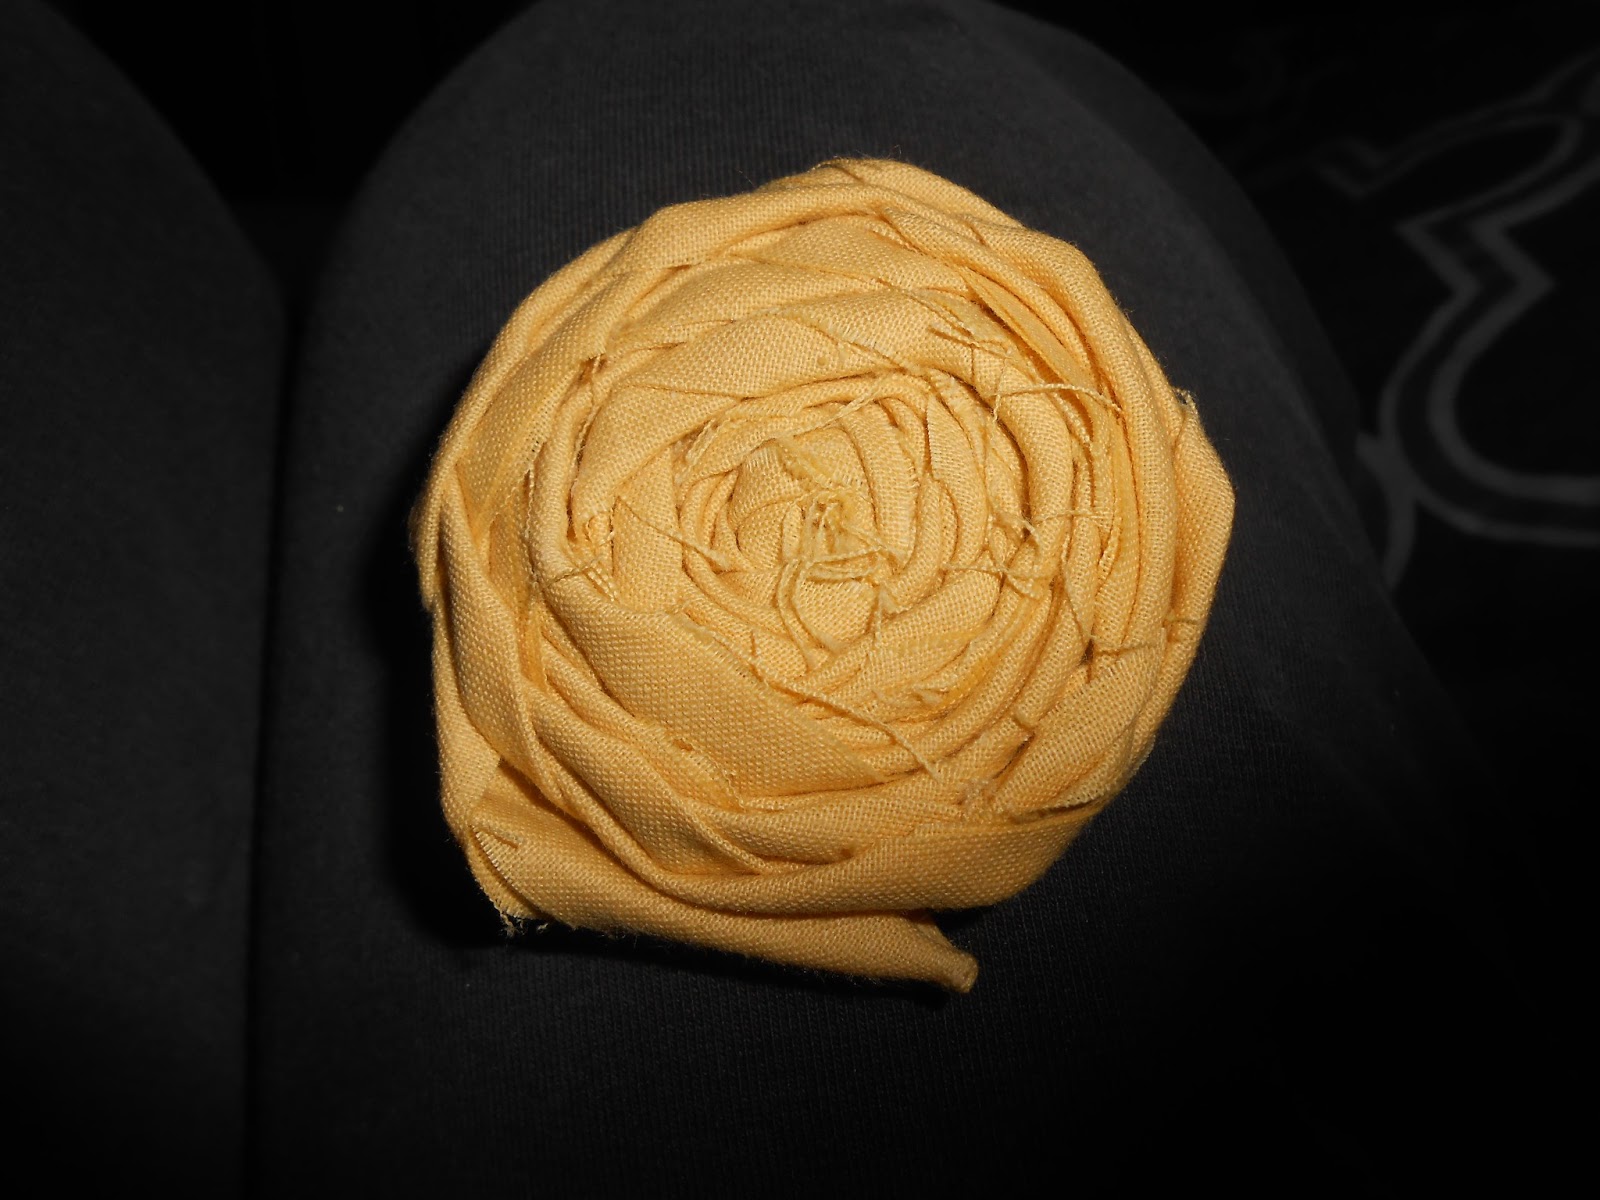

I made a total of 13 flowers...always use odd numbers.


Starting with the large flowers, I hot glued them onto the grapevine wreath.
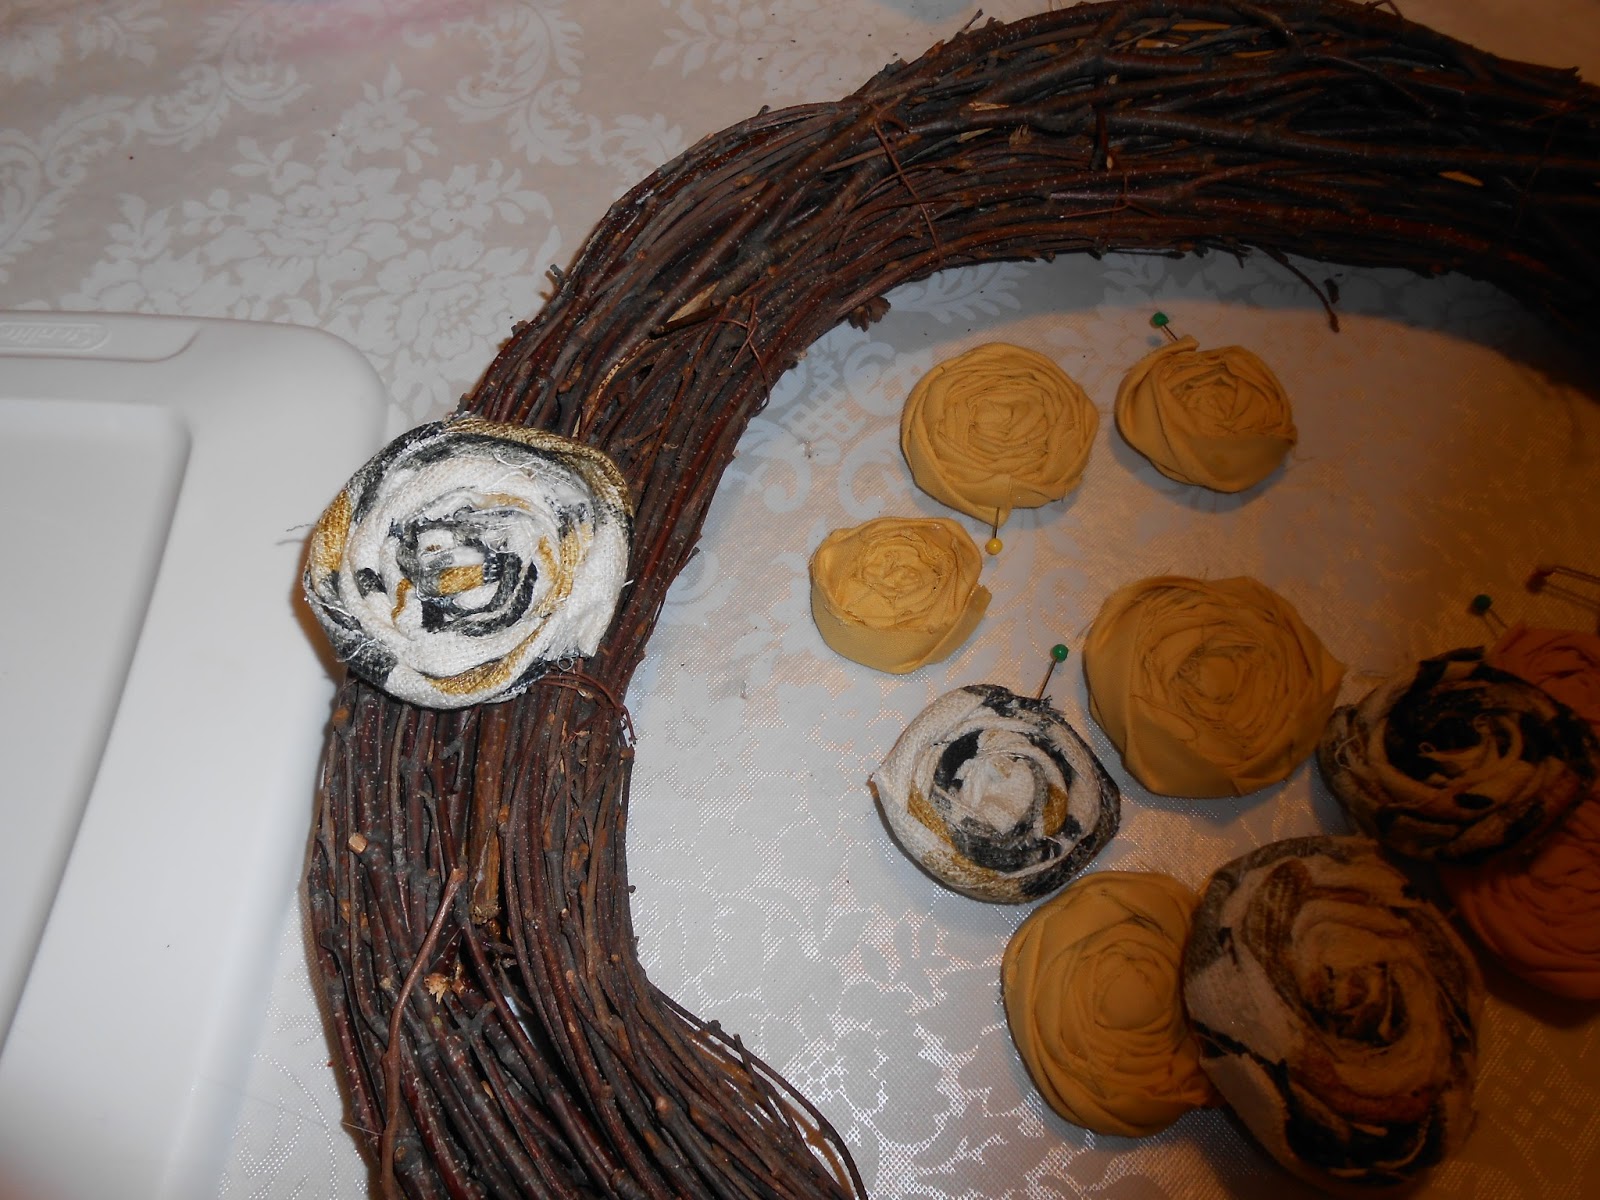

I alternated the two colors and made it so the smaller ones were at the end.  It's more "natural" looking that way, as that's how flowers grow :).


Then I laid the house numbers on the wreath.  On another side note, cut out wooden numbers are ridiculously hard to find!  I went to two craft stores and only found 3 options...one was too big, the others too small.  Letters come in every size and font you could imagine, but none of them had matching numbers...does that seem weird to you??  Anybody know of a good place to buy them?  I ended up with metal house numbers from the hardware store, which worked great...and truth be told are probably more durable.  I just thought it was weird how hard it was to find wooden numbers.


So, since the black numbers didn't stand out against the brown wreath, I spray painted them.  I started with a yellow paint, that I knew would be way to bright...but it was a good start.


I went back over the numbers lightly with gray spray paint.  It gave it more of a speckled appearance when you look up close.  From far away, it just toned the color down.


These were ridiculously difficult to get to stay on the wreath...I have no idea why.  The bottom two was first and went on easily.  The rest were a pain - literally - I burnt myself multiple times with the hot glue gun!  But eventually I got them to stay.

I also added some little sparkly gems to the middle of the yellow flowers...who doesn't love a little bling?  And they were left over from another project...maybe I'll tell you about that project sometime...its a good story :)


A view of the front door with the new wreath.  I'm thinking about painting this door, but think if I do that I will have to paint the rest of the trim on the house.  Not a project I want to tackle - at least not in March.


Total cost of this project?  $6!  I had everything except the numbers.  And, just so there is no confusion...2002 is my address.  I made a wreath for Christmas that had numbers on it and everyone thought I put the wrong year on the wreath...including my roommate....

Be sure and comment and let me know what you think.  And help us spread the word about our blog.  You can follow us here, share this post on Facebook or pin it to Pinterest!  We appreciate the help!

Grace and love,
Jenn


Friday, March 15, 2013

Hair Bow Organizer

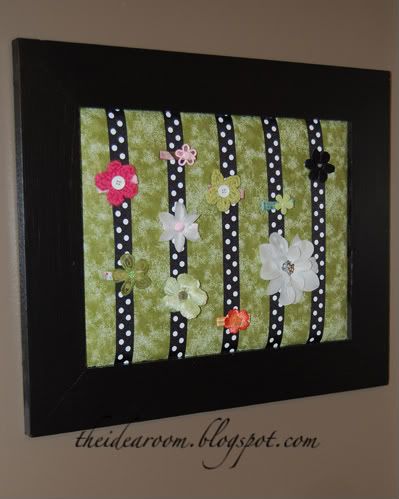
A friend of mine saw this idea and asked me to make one for her niece, who turned 3 last weekend.  Here is the original post from The Idea Room.


So we set off to the craft store to get what we needed.  A picture frame, foam core, batting, fabric & ribbon.  Pretty simple.  (Actually, it wasn't because we went to Michael's, where they don't sell fabric or batting...I had to make a second trip to Hobby Lobby and ended up buying a second frame and she returned the first one...today's lesson?  go to Hobby Lobby first and save yourself time :)


First, cut the foam core to the size of the opening, or ever so slightly smaller (batting is coming and its rather thick!).


Cut a layer or two of batting, a little bigger than the foam core. (I used two layers of the high loft batting - very fluffy!)


Next, cut the fabric to about the same size as the batting.


Begin by stapling one edge of the batting & fabric in place.  This gets tricky with foam core because it doesn't hold staples super firmly, but this is a light duty sort of piece, so just push them into place if necessary and you should be fine.


Next, staple the other side.  There is sort of an art to making this look good.  Too loose, and the fabric will look wrinkly - too tight and the fabric will pull.  Take your time and play with it a little.  As mentioned, the staples are easy to remove, so if you don't get it right the first time, just try again.


Do yourself a favor and clip the corners of the fabric and batting so that there is less bulk to staple through.  I started in the middle of the board and did the corners last.  After everything was tacked in place and looked good, I went back and added a few more staples to make sure everything was secure.


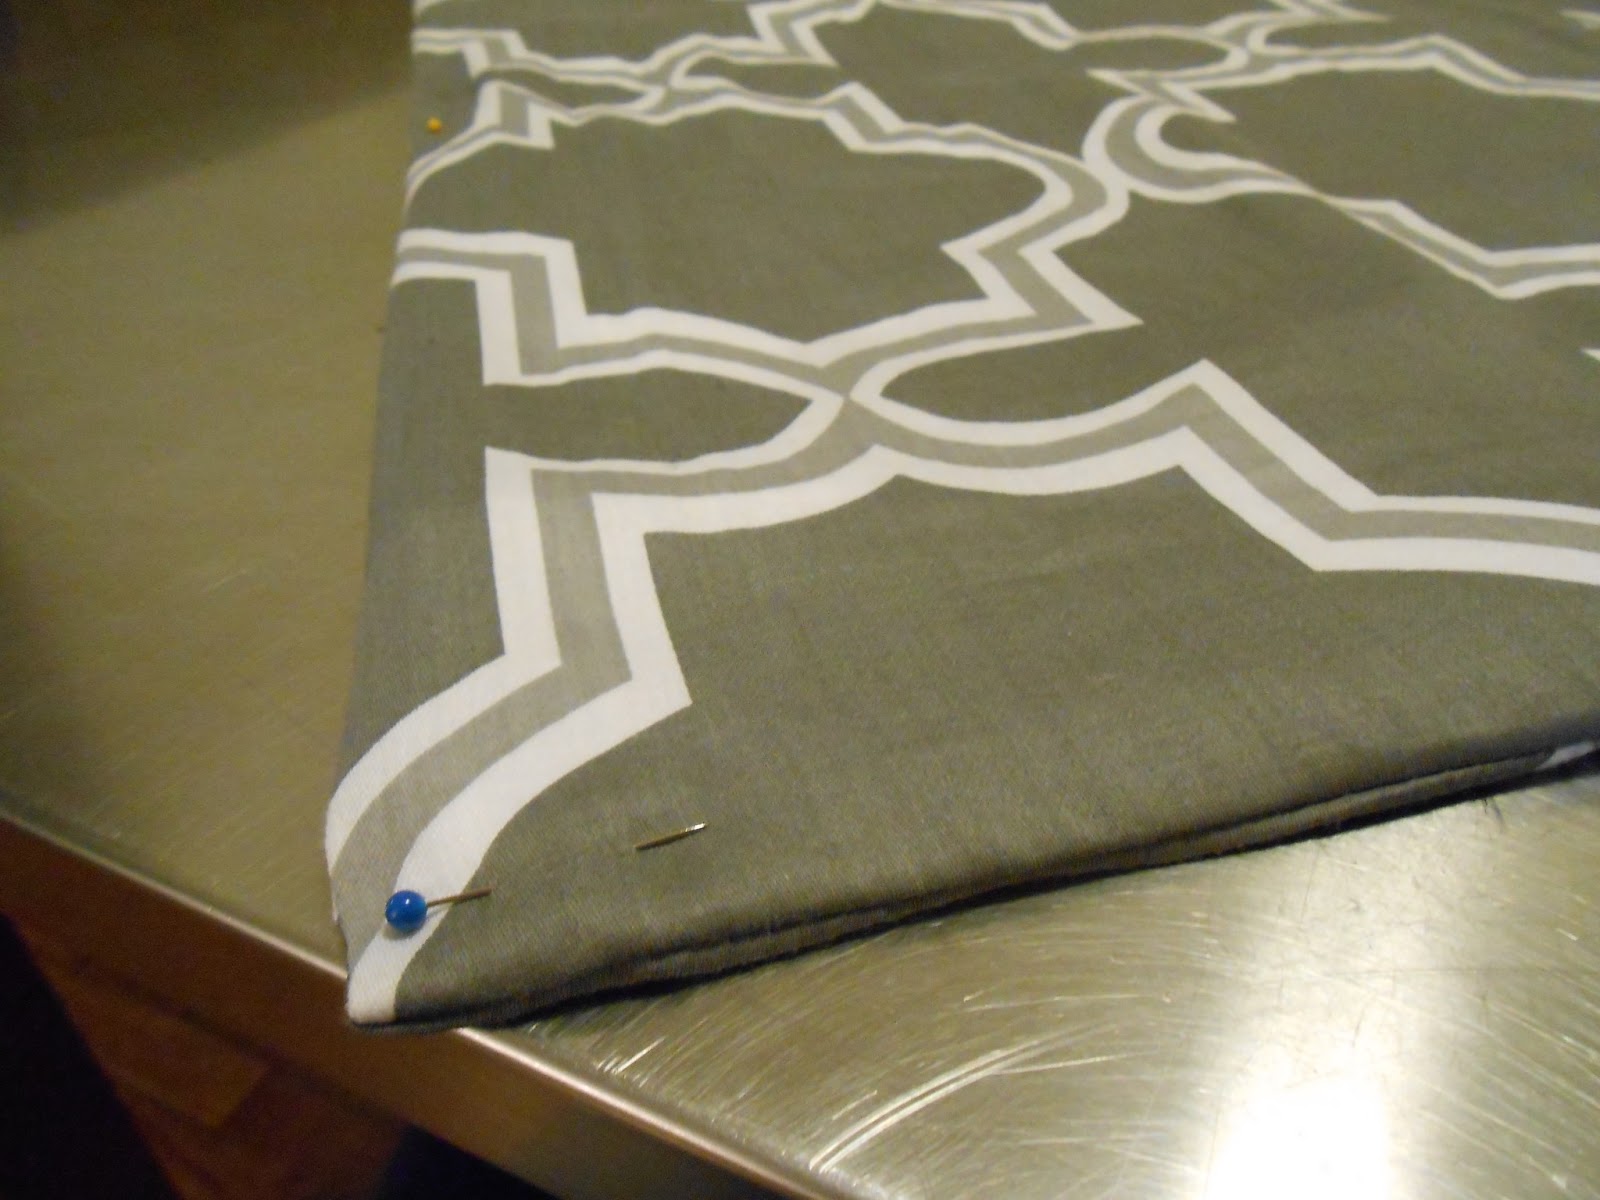
It should look something like this.  Smooth, no wrinkles, no areas pulled too tightly or stretched.  (Although, if its not perfect, don't sweat it.  You're going to add ribbon, frame and bows.  It will hide a lot of your mistakes.


Staple ribbon vertically across the board.  You OCD perfectionists should measure (like I did), otherwise just eyeball it until it looks good.


Place it in the frame and staple it in place.  Be careful and staple at sort of an angle so the staples go into the frame, and not through the front.


Because this was a gift, I wanted to cover up all the messiness.  Had I realized that I wanted to do this when I was buying supplies, I would have bought some felt the size of the whole frame.  It was a last minute decision, so I used poster board.  And because the picture frame had pre-attached hangers, I just put it on the inside part, leaving those exposed.  (It would look better to take the felt to the edges of the frame, glue instead of staple and put the hangers over the felt...oh well, yours will look better than mine on the back...where no one sees it.)


Tada!  The finished product...Soooo cute!  Complete with her two hair bows :).  (She only recently got to the point where she had enough hair to use bows...so her collection is small...I'm sure it will grow now that she has so much space to store them!)


A little dark, but here is Princess Madeline and her new bow organizer!


Comment below to let me know what you think and/or if you try this for yourself!  And don't forget to "follow" us on blogger on the right side of the page.

Grace and love,
Jenn


Friday, February 15, 2013

2013 Redecorating - Fixing Floppy Pillow Flange

As part of my redecorating project, I bought new bedding.  The set came with a duvet cover and 2 standard pillow shams.  Generally speaking, pillow shams are of the devil.  No, seriously...I don't like them.  I prefer pre-made pillows.  Why?  Because you can never get inserts for pillow shams that actually fit.  It seems like in the day and age of EVERYTHING being standardized, they would be able to get this one thing right.  But, no.  So my choices were to stuff the shams in a closet and buy something else, or make them work.  And, being generally cheap and at the time unemployed (I did recently start a new job...yay!!), I channeled my inner Tim Gunn and made them work.

First, I stuffed them with two pillow inserts, instead of one.  It makes them slightly awkwardly shaped, but workable and not looking sad and pathetic.  However, the flange on the pillows was still not good.  Sometimes I wish my style were less contemporary and a little more traditional, because one way to avoid this problem is to use a ruffle instead of a flange.  But ruffles would have looked ridiculous on this bedding set, so I'm stuck with a flange.  Here's how I made it work...


First, I ripped out the stitching that created the flange with a seam ripper.  This is very easy to do because the only thing creating the flange is a row of running stitches.


Then I flipped the sham inside out and ironed it so it would be flat.


The flange on these shams was about 1 3/4" so I cut a 2 1/2" wide strip of buckrum.  I cut it so it was about 1/4" shorter than the length of the seam (you will see why later).  Buckrum is a stiffener often used to make curtains.  You can find it at JoAnn's for about $5 yard.  A yard was more than enough for both shams.  I pinned it in place so that the outer edge was along the seam (not the raw edge, you want it to lay flat, not be folded over when you invert the sham).


I had to redo this about 3 times because I kept messing it up.  So here's what I learned (the hard way).  First, pin on the front of the sham, not the back (where the overlap is).  Second, pin along the outer edge first.  At this point, it's okay if you go through both layers of fabric.


Next, put something hard that you can't push a pin into inside the pillow sham (I used a random piece of plexi-glas I had laying around).  Then using the plexi-glas as a barrier, pin along the inside of the buckrum, but only go through the front layer of fabric.  Why?  Because you're going to sew from the outside, so you can't have pins along the outer edge, or you'll never get them back out.  And if your pins go through both layers of fabric, you won't be able to invert it.
 

Once you've pinned the buckrum in place, invert the pillow case.  You will need to fuss with it a little to get it back in place (because its only pinned on one side).  This is also why you need it a little shorter than the length.  If it is even slightly longer than the inside length, it will not fit inside the sham and lay flat.  (Yet another thing I had to do twice...)  Once its in place and flat, iron your seams so they are smooth.


You may need to pin the corners together (from the outside) so it doesn't move.


Finally, using a matching thread, restitch the flange.  You should be able to see the needle holes from the original stitching, so use that as a guide.  You should notice that the buckrum now fills the entire flange, and extends into the body of the pillow about 3/4".  This is critical!  If the buckrum were only the width of the flange, it would not help it stand up, it would be stiff, but still falling over.


The finished product...Flange that stands up nicely!

Total cost of project

Shams                    part of the $40 bedding set I bought...not counting it in project cost.
Buckrum                $4 (it was on sale!)
Thread                   $2
Total                      $6

Let me know what you think and/or if you try this project for yourself!

Grace and love,
Jenn


Friday, February 8, 2013

Redecorating 2013 - How to update laminate countertops

My house has the most hideous counter tops you have seen...No, seriously...they're really awful.  I don't even know why they make laminate in this color.  When we first moved in, I toyed with a lot of ideas about how I could disguise them - unattached ceramic tiles , paint, just never walking into the kitchen...and finally found the idea of using Contact Paper.  It was 3 years ago, so I have no idea where I found the idea, but I'm sure it was the result of a Google search.

Since then, I have had to redo them about once a year.  It costs less than $10 and takes about 2 hours - not bad!  This year, I had to redo the whole thing (usually I just do the flat surfaces, and leave the back splash) because they discontinued the color I was using.  So you get to see the process from start to finish.  First, a few before pictures...


Why?  Just Why?


This side is even worse because of the matching back splash...

So for this project I needed contact paper, scissors, a utility knife and something to smooth out the paper.  I use my Pampered Chef Handy Scraper because of the rubber edge, but a piece of stiff cardboard will do the same thing.

First, cut the Contact paper into pieces that are big enough to cover from the back over the front edge of the counter top with plenty of extra (1-2").  Then, starting on one end, peel off the backing and lay the first sheet as straight as possible.  If the end of the counter is exposed, make sure you can cover that edge as well.  It's a big piece of paper to work with, so I only peel off 6-8" of the backing paper so that it doesn't get stuck together.  Use your scraper (or cardboard) to press it into place and remove any bubbles.  Start from the middle and work towards the edges.


Slowly peel off the backing paper as you press the paper into place, until the whole sheet is stuck down and bubble free.


Then take your *sharp* utility knife and trim along the edges.  Be careful so you don't cut off areas you wanted to cover.  On the corners, you will need to cut along the edges so you can overlap the pieces.


Then go on to the next piece.  You will want to lay it carefully, and may need to re-position it a couple of times to get it right.  You'll want a small overlap, probably less than 1/4".  Then continue as you did with the first one until the whole section is covered.


Take extra care around the sink to make sure it fits well.  I also do extra overlap because of the extra water that always seems to be on the counter.  I don't have many problems with it peeling, but just be extra careful.


So much better looking once its done!


Contact paper will hold up with light to medium use.  Always use cutting boards as it can be cut easily, even with dull knives.  I find that the surface holds up for about a year (I usually replace it after canning season, which is when it gets the most damaged - I was a little behind this year!)  This is only the second time I've done the back splash (It lasted 3 years), and if I hadn't been changing colors I wouldn't have changed it...it easily could have lasted a few more years.


Total cost of project

Contact Paper (2 rolls)                        $12
Tools                                                  Already had

Total                                                   $12

Comment and let me know what you think and also let me know if you try this for yourself!

Grace and love,
Jenn