Tuesday, March 26, 2013

Contemporary Kitchen - Guacamole


One of my favorite dips/sauces is guacamole!  It gets a bad rep for being high in fat, but I always argue that while fat is fat and moderation is always important, avocado fat is a better fat than animal fat.  You can disagree with me...I'm okay with that.  So while I don't recommend eating the whole bowl in one sitting, you're better off adding a dollop of guac to your burritos than you are sour cream!

And bonus, its really easy to make and not "terribly" expensive...especially if you can get a good deal on the avocados.  My best suggestion is to go to a Mexican grocery store...they know better than to sell yucky ones and they go through them quickly enough that they can bring them in ripe - not the green crap you get at regular grocery stores.  Although, if your grocery store has a section where they sell the "past its prime" produce, keep your eye out for avocados...I often find them there and they are practically perfect for making guac!  This is the recipe I've been using for about 5 years...I never wrote it down, so I have no idea where I got it.  Therefore, I'm claiming it as my own :D


So to begin, choose ripe to overripe avocados.  How many avocados you use will dictate how much guac you're making and how much of the other ingredients you need.  For this example, (and the amount you need for a small group or party), I used 4 avocados.

Start by cutting them in half, removing the pit (carefully!  I once ended up with a knife in my finger and a trip to the emergency room because I was careless with this task!) and removing the flesh from the skin.  They sell fancy knives to get them out of the skin, but a large metal serving spoon does the job just as well.  Then dice the avocado into smallish pieces.  One unitasker, that I don't currently own but have used before and love for this task is an egg slicer.  Put the avocado in it, slice, turn 180 degrees, slice again and flip on its side to slice a 3rd time - perfection!


Then dice up some tomato.  For 4 avocados I used 2 roma tomatoes.  This is definitely a place for ripe tomatoes, not the grocery store winter crap!  Add it to the bowl with the avocado.


Next, dice up some onions.  I had a large onion, and used maybe 1/6 of it?  This also depends on what you like.  You can always add more or less.  I dice it up into smallish chunks and prefer not to use a food chopper (one less thing to wash and they're less mushy too).  Add it to the bowl.


Then you want to add some cilantro, again to your own taste.  I really like cilantro, and appreciate how inexpensive it is.  I don't appreciate how quickly it goes bad.  If you're a once a week or less grocery shopper, you may have issues here.  More than 2-3 days in the fridge and it starts to wilt.  So buy it right before you need it.  A typical bunch of cilantro will be WAY more than you need, so plan some other meals you can use it in, or just get over it because it's so cheap to begin with.  I snip the leaves off the stems (with my fingers, no fancy tool required), and  pile it on a cutting board.  I've never measure this, but its probably about 1/8 cup if you firmly packed it in.


My favorite tool for this next part is a pizza cutter.  You want the cilantro leaves chopped into small pieces, so just run a pizza cutter through it a couple of times.  I find this to be easier than using a knife.


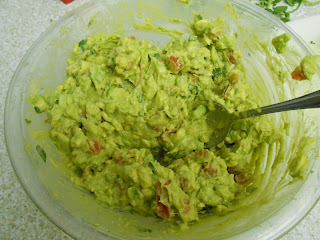
You may notice that I had to switch to a bigger bowl at this point because I miscalculated, but next, begin to mix up these first ingredients.  The riper your avocado the easier it is to smash.  However, I prefer mine to still have some chunks, so don't mix it quite as much.


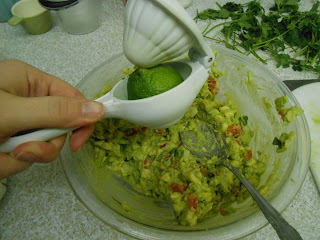
After it is mixed, add the juice of one lime and some salt.  Again, I rarely measure but I would guess I use 1/4-1/2 teaspoon of salt, but you can adjust to your taste.  Another worthwhile unitasker for this is a citrus juicer.  Before cutting the lime, I roll it against the counter a few times because it makes it easier to juice.  Then cut it in half and place one half at a time in the juicer and squeeze.  If you don't have a juicer, you can do it by hand (and the step of rolling it becomes even more important!), you just won't get as much juice from the lime.


Mix everything again.  The juice helps to smash the avocados a little more and makes it saucier and less chunky.  Its primarily purpose, however, is to keep it from turning brown.


A tip from little old Mexican ladies to keep the guacamole from turning brown is to store it with the avocado pits still in it.  I have no idea what the science behind such a suggestion is, but I do it, it seems to work and they swear by it. 


So, try this out and leave a comment to let me know what you think. 

Grace and love,
Jenn


Wednesday, March 20, 2013

Contemporary Kitchen - Pesto Ranch Chicken

I have a busy schedule, and we have fallen into the very bad habit of eating out practically every night... No Joke.  I'm trying to save some extra money and this is the most obvious place to start.  I have tons of recipes pinned on pinterest that I would like to try but I have one major problem.  My Dear Hubby hates casseroles and anything that comes out of a crockpot... purely psychological, I think.  I mean, if you choose the right recipes, what is the difference between a pot roast cooked in the oven and a pot roast cooked in a crockpot, other than you can put it in the crockpot before you leave for work and eat it when you get home?  So you may see a few more of recipes like this from me... crockpot recipes revamped for the oven.  I know, completely opposite of what most people want, but I will also include or link to the crock pot recipe for the normal people out there.


Another aside... we are a family of three that eat small portion sizes and do not eat leftovers... so even if I am following a recipe for 8 servings, I usually cut it down at some point so we have just enough for dinner. Therefore, my pictures will not necessarily reflect the recipes serving size, but I will post the recipe for the larger size.

The idea for this recipe is Pesto Ranch Crock Pot Chicken from Picky Palate and appears very simple as most crockpot recipes are... just dump it all in.  This does make a creamier sauce, and I may play with my recipe in the future to make a creamier sauce as well.


There are only four ingredients and nothing out of the ordinary. Chicken; I used boneless skinless breasts. I happened to have thin cut on hand (I only used 1/3 of the package shown and froze the rest), 1 packet of ranch dressing mix (I have a jar, 3Tbs = 1 Packet), I also added granulated garlic, and a jar of pesto sauce.


Mix the ranch and the granulated garlic, coat both sides of  the chicken and place it in a 9 x 13 baking pan that has been sprayed with cooking spray.


Stir the prepared pesto and spoon some over the top of each piece of chicken. Place in a 350 degree oven and bake.  These thin cut breasts took 30 minutes.  I would probably cook regular breasts 45 minutes.

Guess what? Dear Hubby loved it! 
I hope you enjoy this recipe... Please be sure to comment and let me know what you think and/or if you try it!

Love and God's peace to you,
Christine


Monday, March 18, 2013

Redecorating 2013 - Fabric Flower Wreath

My latest project from my redecorating kick (so close to being done...which my checkbook will greatly appreciate!) was to make a new wreath for my front door.  For the last few years I had been using a simple berry wreath, but alas, the sun has finally damaged it to a point that I can no longer stomach looking at it.

So I found a couple of ideas on pinterest that I liked.  These are from Little Page Turners & Teach.Craft.Love.


What I love about this project is that I only had to buy one thing...everything else I had!  Here's what I scrounged up or bought - an old wreath, some fabric scraps leftover from other projects and some simple 4" house numbers.


This was an old Christmas wreath that, like my last door wreath, had faded from the sun and weather.  So I removed all the berries, leaves & pine cones, leaving a basic grapevine wreath.  (I made that sound easy, but it definitely required the use of some wire cutters...they were not messing around when they put this together!)  I also remove a couple of the brown wires that were holding the wreath together, so it looked a little better.


Next, I made some fabric flowers.  I'll show you how, but if you still don't get it, check out Little Birdie Secrets - this is where I learned how and she has a video tutorial if the pictures aren't making enough sense.

Start with a 1" strip of fabric.  Depending on how long it is will determine how big your flower turns out.


Fold it in half lengthwise.


Tie a knot in the end.


Fold the short end of the knot back towards the long end and start wrapping and twisting the long end in a coil.  You can play with this to see what works, but I found that one twist for every 1/4-1/3 of a revolution was good.  So at the beginning you are twisting more often, but as the flower gets bigger, there is more distance between the twists.  This is good as it will help it stay together.


The tutorial I mentioned used a LOT of glue, she said every 1/4-1/2 revolution to use a spot of glue.  I didn't find this to be necessary, but I also wasn't using shiny or slippery fabrics.  So do what works.  If I noticed the flower starting to slip and come apart, I added glue to keep it together.  I used Aleene's Fabric Fusion and it worked well.  (As a side note, its a good thing that it's non-toxic because I got more than I ever hoped for in my mouth!  I kept taking the cap off with my teeth because my hands were full - flower in one hand, bottle in the other...when I went to put the cap, which was between my teeth, back on...I missed.  More than once.  Gross!)


When you get to the end, you have two choices.  If this flower is as big as you want it, skip the next step and glue it in place.  If not, you can work in another piece of fabric to make the flower larger.


Put a bit of glue about 2 inches from the end so you can let go of the flower without it falling apart.  Then take a second strip that is the same size and lay it inside the first strip and fold them together.  The first fabric should be on top.  You may need to glue them together.


Then, continue to twist the fabric together until the flower is done.  Secure the end with glue.  You may want to stick a straight pin in it to hold it together until the glue dries.


Tada!  A fabric rose!  Well, one anyways...you will need many...


I made a total of 13 flowers...always use odd numbers.


Starting with the large flowers, I hot glued them onto the grapevine wreath.


I alternated the two colors and made it so the smaller ones were at the end.  It's more "natural" looking that way, as that's how flowers grow :).


Then I laid the house numbers on the wreath.  On another side note, cut out wooden numbers are ridiculously hard to find!  I went to two craft stores and only found 3 options...one was too big, the others too small.  Letters come in every size and font you could imagine, but none of them had matching numbers...does that seem weird to you??  Anybody know of a good place to buy them?  I ended up with metal house numbers from the hardware store, which worked great...and truth be told are probably more durable.  I just thought it was weird how hard it was to find wooden numbers.


So, since the black numbers didn't stand out against the brown wreath, I spray painted them.  I started with a yellow paint, that I knew would be way to bright...but it was a good start.


I went back over the numbers lightly with gray spray paint.  It gave it more of a speckled appearance when you look up close.  From far away, it just toned the color down.


These were ridiculously difficult to get to stay on the wreath...I have no idea why.  The bottom two was first and went on easily.  The rest were a pain - literally - I burnt myself multiple times with the hot glue gun!  But eventually I got them to stay.

I also added some little sparkly gems to the middle of the yellow flowers...who doesn't love a little bling?  And they were left over from another project...maybe I'll tell you about that project sometime...its a good story :)


A view of the front door with the new wreath.  I'm thinking about painting this door, but think if I do that I will have to paint the rest of the trim on the house.  Not a project I want to tackle - at least not in March.


Total cost of this project?  $6!  I had everything except the numbers.  And, just so there is no confusion...2002 is my address.  I made a wreath for Christmas that had numbers on it and everyone thought I put the wrong year on the wreath...including my roommate....

Be sure and comment and let me know what you think.  And help us spread the word about our blog.  You can follow us here, share this post on Facebook or pin it to Pinterest!  We appreciate the help!

Grace and love,
Jenn


Friday, March 15, 2013

Hair Bow Organizer

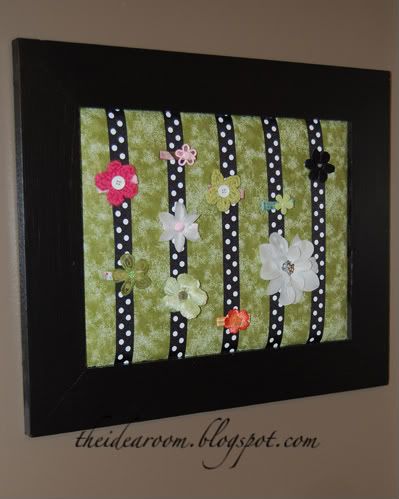
A friend of mine saw this idea and asked me to make one for her niece, who turned 3 last weekend.  Here is the original post from The Idea Room.


So we set off to the craft store to get what we needed.  A picture frame, foam core, batting, fabric & ribbon.  Pretty simple.  (Actually, it wasn't because we went to Michael's, where they don't sell fabric or batting...I had to make a second trip to Hobby Lobby and ended up buying a second frame and she returned the first one...today's lesson?  go to Hobby Lobby first and save yourself time :)


First, cut the foam core to the size of the opening, or ever so slightly smaller (batting is coming and its rather thick!).


Cut a layer or two of batting, a little bigger than the foam core. (I used two layers of the high loft batting - very fluffy!)


Next, cut the fabric to about the same size as the batting.


Begin by stapling one edge of the batting & fabric in place.  This gets tricky with foam core because it doesn't hold staples super firmly, but this is a light duty sort of piece, so just push them into place if necessary and you should be fine.


Next, staple the other side.  There is sort of an art to making this look good.  Too loose, and the fabric will look wrinkly - too tight and the fabric will pull.  Take your time and play with it a little.  As mentioned, the staples are easy to remove, so if you don't get it right the first time, just try again.


Do yourself a favor and clip the corners of the fabric and batting so that there is less bulk to staple through.  I started in the middle of the board and did the corners last.  After everything was tacked in place and looked good, I went back and added a few more staples to make sure everything was secure.


It should look something like this.  Smooth, no wrinkles, no areas pulled too tightly or stretched.  (Although, if its not perfect, don't sweat it.  You're going to add ribbon, frame and bows.  It will hide a lot of your mistakes.


Staple ribbon vertically across the board.  You OCD perfectionists should measure (like I did), otherwise just eyeball it until it looks good.


Place it in the frame and staple it in place.  Be careful and staple at sort of an angle so the staples go into the frame, and not through the front.


Because this was a gift, I wanted to cover up all the messiness.  Had I realized that I wanted to do this when I was buying supplies, I would have bought some felt the size of the whole frame.  It was a last minute decision, so I used poster board.  And because the picture frame had pre-attached hangers, I just put it on the inside part, leaving those exposed.  (It would look better to take the felt to the edges of the frame, glue instead of staple and put the hangers over the felt...oh well, yours will look better than mine on the back...where no one sees it.)


Tada!  The finished product...Soooo cute!  Complete with her two hair bows :).  (She only recently got to the point where she had enough hair to use bows...so her collection is small...I'm sure it will grow now that she has so much space to store them!)


A little dark, but here is Princess Madeline and her new bow organizer!


Comment below to let me know what you think and/or if you try this for yourself!  And don't forget to "follow" us on blogger on the right side of the page.

Grace and love,
Jenn